Week 1:
I spend my first week focused on research for the project my groupmate and I quickly established the IP we were going to use for this project which was Monster Hunter, with this in mind I looked at the existing IP’s resources and references as well as other games that fit the aesthetic and themes on top of photography, armour and creatures.
I wasn’t planning to go down the route of creature design for this project but I did however take time to look through different creatures that could inspire armour sets, as within the game you acquire materials from different Monsters and use them as crafting materials for armour. I took a thorough look at the roster for Monster Hunter looking across a few of their games, there is a lot of draconic inspired creatures throughout but amongst them are some pretty unique looking creatures that no doubt make for some interesting armour sets.
Another game I looked into as reference for creature designs is Dauntless a game I played a couple years back when it came out, it followed a very similar play style in terms of hunting ‘Behemoths’ which would drop items that you would use to craft armour. So essentially the same type of game but with a significantly more stylised aesthetic.
Naturally I began to look at armour sets next you can see at the top some from Monster Hunter and Dauntless, it is interesting how they translate different features from different monsters into the armour sets. I also took a look at armour sets from Elden Ring as FromSoftware has some really unique armour design and shape language which I felt could be appropriate, on top of this I looked at a variety of Concept Art on ArtStation.
Below I focused most of my references more specifically looking at specific armour types from different cultures such as the Knight and Samurai, alongside some particularly famous ones from history as I wanted to have more real world references. I took a look at Ryotaro Horiuchi’s photography work as one of their recent works was looking at samurai culture and those who carry it on in the modern age, but some of their outfits and shapes are really unique I felt it was a strong source of ideas and designs.
Week 2:
I begin further research into a specific character archetype/class I wanted to look at sage-like characters and wanted to play a bit with that idea. Looking back on the Monster Hunter franchise I came across a race of humanoids called Wyverians, descendants of Wyverns with pointed ears, and an increased life span. Some Wyverians can live for hundreds of years. Many, though not all, Wyverians also possess digitgrade legs, there is often great differences of height among the population also. Due to their long lifespan they are considered more intelligent and rational than humans as well as being more attuned to nature, they tend to avoid conflict and prefer peace but still recognise the value of Hunters.
I felt this would allow for a more unique character design as opposed to a human and allow for more design freedom and cultural influence in the design process.
With being more set on my character race I started to think about different sorts of classes that would be appropriate and the archetypes that would fit the race. I wanted to play into the idea of their more peaceful perspective and connection with nature/wild life. This led me down the road of a Sage class someone that could educate others on the environments that surround them and has a strong connection with the environment and inhabitants of it.
I was particularly fond of a few of the Monsters from the swamp-like biome which fed into the idea further, I started thinking of a swamp sage or potentially a shepherd of the creatures in that environment, someone very attuned and harmonious in nature.
Week 3:
Using the suggested generators I helped further develop the understanding for the personality, archetype and potential powers of this character. This would help when it comes to deciding how they carry themselves and act as well as potential unique physical elements.
Using the suggested prompts I deliberate and tailor different elements that felt suitable for this character.
Character Concept
Gender: Male
Species: Wyverian
Personality: Kind hearted, Harmonic, Hates conflict.
Archetype: Sage/Hippy/Caretaker
Alignment: Lazy Neutral
Powers:
Perfect Health: Never sick (Due to inhabiting the harsh swamps built up an immunity to the affects of harsh cold weather as well as poisons often found there.)
Improved Grip: Vice-like grip (Extremely strong from traversing the with bare hands and feet as well as foraging and taming/riding Pukei Pukei.)
Lizard Eyed: Spending over a century amongst the Pukei Pukei, consuming similar food and inhabiting the same environment he begins to develop their eyes which allow for UV light and heat vision as well as the ability to focus on things with each eye.
Now that I have cemented my idea a bit further I started silhouettes and thumb nailing characters based on my research, incorporating all the design decisions I had already made.
I took time to annotate what I had come up with to establish what I felt was successful so I could work towards a more finalised concept.
Week 4:
I started to to finalise the concept and look at poses that express the character archetype and personality more appropriately. Although this was more telling of his personality it wasn’t the best for showing of his shape, clothing, e.t.c.
I did a second pose which allowed me to show of the design decisions a bit better.
At this point I really needed to start doing my 3D sculpt as time was ticking on but I had been a bit reluctant as I didn’t feel super confident about my character’s design currently, I took some time to discuss this with Luca and express that and we looked to how we could improve things and also make it fit the IP more appropriately. Luca was saying I could really exaggerate some of my shapes especially with things like the hat, staff, and gourd.
Week 5:
At this point I felt I needed to get on with my sculpting so I made a quick A Pose turn around loosely based of my character, I would’ve taken more time to make the anatomy better fit my intentions but feel more comfortable making these changes in ZBrush.
I blocked out the general shapes and put them together before merging them down so I could start sculpting them properly. I got some references from real people as well as some sculpts which would help influence the style of my anatomy.
I started with the Torso as this would be partially on show in the design so I wanted it done to a good standard, it was also a new experience to sculpt an older person so having references wen a long way.
Following the Torso I worked my way down to the legs again being conscious of the age and how that is shown with loose/wrinkly skin.
I chose not to waste time on the toes as they’ll be covered by shoes but if I have time I may come back to do them for practice purposes. For the hands I used the IMM BParts brush to insert some hands onto my model and then sculpted it in a way that it would suit the rest of the model by making the hands look more aged and defined.
Lastly I had to do my face this was going to be a relatively key part so I wanted to get it to a good point before going into retopology, I did my best to sculpt it using the references I had and decided to make it asymmetrical as it is more common in older people to loose facial symmetry however I didn’t consider how this might further complicate my Quad Draw retopology process. I think I should have done the retopology then come back to my sculpt and made this change but we shall see how I handle it.
Week 6:
So I started Quad Draw but quickly came to the conclusion that asymmetry wasn’t favorable for me, I also started with way to many faces around my points which led to an over complicated topology. Here is an example of that which I have decided to restart on.
After my initial attempt I learned a lot and was more conscious of the edge flow I made in my next attempt.
I continue my retopology started by making loops at different important positions for example bony landmarks from those loops I can fill in the gaps and add loop cuts to get a desirable amount of faces. For the elbow and knees in particular I did my best to ensure for collapsible joint topology to allow for good flexibility when coming to rigging and animating later in the project.
Week 7:
I now have both high and low poly for my character base mesh so my next task was to create hi-poly clothing and a low-poly version too before I can start texturing. I go back to my hi-poly character in ZBrush and mask out areas for different clothing elements and use the extract tool (defining the desired thickness beforehand) from there I can sculpt on my extracted clothing elements and use the cloth brushes.
Now that I had the base of my clothing done I moved on to the armour pieces and accessories for my character. Using the same method I extracted the shapes, scaled and sculpted them to get the shape. I used Alphas to create details in both the pauldron and gauntlet using a mix of my own made Alphas and some that come standard with ZBrush alongside the DamStandard brush to create some engravings.
I continued to add different elements based of my research and initial 2D concepts once I was happy with the result I used the ZRemesher tool and Decimation Master tool to create a low-poly version that I could take into Maya to clean up.
Week 8:
In Maya I removed all interior faces and also fixed any clipping issues by using the inflate brush on a low strength setting, following this I started my UVing which brought to my attention an issue with the original buckle on the strap running over my characters chest for the pauldron which was an IMM from ZBrush, It would just have loads of baking errors whenever I put it into substance to bake. In the end I decided to go back and make my own one that was simpler and ended up being more effective overall.
Here are my UVs: I prioritised space on the Torso and Face as they were particular focal points and I also increased the sizes on my more prominent clothing elements that would require more fidelity.
I had now cleaned up my low-poly and was ready to start baking and texturing, I took my low and hi poly into substance to begin the baking down my details here you can see the results from the bake. I think it went really well and got good detail in the right places thanks to my UVs.
Week 9:
In Substance Painter I started with throwing some materials and colours on to get a general idea of how I wanted the character to look. The only thing I really took time to texture at this stage was the Gauntlet and Pauldron using techniques I had learnt in my previous project to make a realistic metallic material and then blackmasking areas for the Gold Sakura flowers and engravings.
This ended up changing quite significantly down the line but was good to get the ball rolling, the next major focus for me was trying to get a realistic skin texture as I felt the standard ones in substance didn’t really work well enough. I recalled the concept of colour zones from Year 1 lessons with Peter and felt that could be usefully applied below a skin layer to create some different tones for the face and body.
Using some references I started painting in the layers starting with a Red Base and painting the Blue and Yellow colour zones on top the result you can see below it really helped in the face as well as helped define the muscles better in the body too. I wasn’t too concerned with how the legs looked as they wouldn’t be on show anyway.
I wanted to make my clothing more unique and intricate so I went online and found some free use seamless patterns which I took into photoshop and made into Alphas to apply to my clothes.
I am happy with how this turned out but wanted to experiment with some different colour palettes to see what would work best.
I had initially intended for the character to have lots of green in their clothing to reiterate and suggest their ties to nature and the Pukei-Pukei, however I found the red and blue variations to be more appealing at this stage. I continued to experiment with different patterns and colours for the pants as well.
I liked the look of the red one most but felt the red fabric with patterns on both the top and pants was a bit overbearing so I decided I would try to go for something more simple. I looked back at some references particularly ones of the Wyverian characters from the game, their clothing and colour palettes which led me to this.
It definitely felt I was getting closer and on the right track but still definitely areas for improvement. I got feedback from my project teammate Laura and she agreed and advised I try something that complimented the top piece like branches or flowers, so I tried that next and was far happier with the outcome Thank you Laura!
Week 10:
Following this I went back to my references and initial concepts and decided it was time to focus on the additional elements being the Staff and the Hat I sculpted these in ZBrush then using the Decimation Master tool and ZRemesher to sort out my low poly before taking them into Substance Painter for texturing
Here are the textures I made I tested a few different things for the hat in particular till I became more set on the design.
I added some Mossy elements to the staff to make it blend in more the for swampy environment it would have be procured from. On the hat I have a clothe tag that hangs from the rim for this I wanted to show some tearing and damage I did this by creating an Opacity Map and exporting this so I can apply it in unreal with a mask on the material. I also went back to my Clothes and did this to the front cloth too, making it a bit more believable.
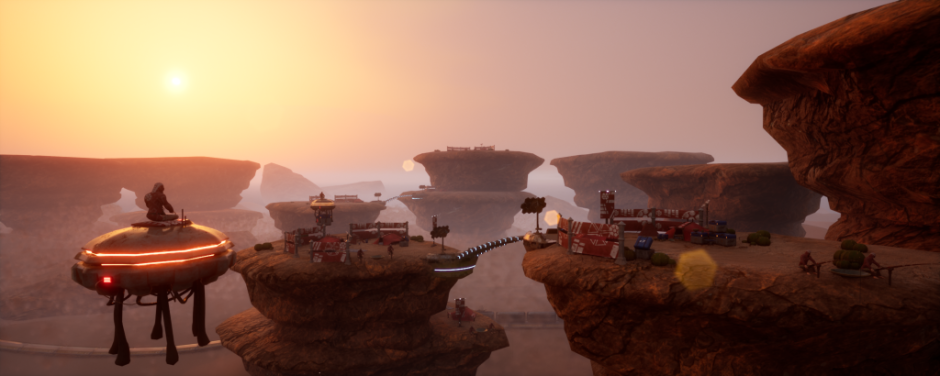
I take my finished textures into Unreal to see the result in a lit scene.
Week 11:
The final push now was Rigging and Animating the character this part of the project was most challenging for me as I had no experience rigging or animating in MAYA before! I have some experience in Blender but felt this was an appropriate opportunity to learn something new and try out MAYA’s rigging systems.
Following Mariana’s tutorials I used the Advanced Skeleton plugin she suggested which allowed me to quite quickly produce a base skeleton I just had to bring in the biped base align the bones to my character and create the advanced skeleton. This was a really quick and efficient tool and saves time having to create controllers for each bone. Although I will later have to produce controllers for custom bones for cloth elements and my gourd hanging on his belt.
Following this I now needed to test what was working as intended and then start my weight painting, my legs and arms were working appropriately I did edit the elbow region slightly.
The fingers took quite a bit of adjusting as there was a lot of weight paint spreading over the fingers that needed cleaning up.
I eventually got them all to work as intended without any effecting other fingers
Unfortunately at this point my file got corrupted and I had to start a new one this was frustrating but I felt like I knew the process better and repeating it would improve that knowledge and understanding.
This time I followed all the steps as before but when I got to the weight painting I had loads of issues with the fingers this time not only were the wight paints subtly affecting multiple fingers as shown below but, every time I would clean up one whenever I went back to check on the weights they would reset and undo everything I had done leaving me in a cycle of constantly going back to fix things.
I did ask my Tutor Luca about this and he gave me some resources and suggestions on how to deal with the problem and also suggested I blend well between the joints with my weights which did help with a lot of clipping issues. I also did some research and found out that if I change the Max Influence this seemed to help with the weights resetting themselves. With this new found knowledge I took it from the top again and restarted.
This time around everything seemed to be going smoothly until I looked at my legs and found all the weights completely wrong from the start with them all being shifted down at least a joint or two which looked like this.
I was a bit frustrated and felt it would be quicker to start fresh again rather than spending ages trying to salvage it. So again I start from the top and very quickly got through everything as I had become very familiar with the process by now, this time the legs were fine. I fixed my hands, elbows, cleaned up my shoulders too original on the left fixed on the right. I then mirror my weights.
I finally had it all done after a fair amount of trials and tribulations I had successfully created and painted my rig for my base mesh although a little pain staking I learned a lot throughout the process and became quite efficient by the end of it.
Following this I decided I would try to start on my custom bones for my cloth and other accessories so I started with my Front Cloth making bones down the middle and creating controller for each of them.
I did this for my front cloth, gourd and gourd rope as well as the piece of cloth dangling from the hat.
I now had all my controllers set up to start animating with, I used some references from ‘The Animator’s Survival Kit’ Book to determine my walk cycle frames and limb placement It also gave me the idea to use a plane to determine the head height and where I have contact, pass, up and down.
Here are the results from the walk cycle animation.
Feeling confident with the process and having achieved a basic walk cycle I chose to push myself to achieve something more complex for the character and incorporating their Staff.
This took a while to get the correct hand placement and flow of the front cloth but in the end had a really cool animation to bring into Unreal. I brought in my character, texture and animations. I first import my static character and staff (without animations) to get my skeleton and then bring in my character and staff (with animations).
I now took a bit of time to set a scene to really sell the character better I reused some Pillar and Tileable Brick assets I made for my previous Sand Critter project as well as a ‘Great Bald Cypress’ Tree asset by https://sketchfab.com/BaptisteBerard to help set dress. I also used ‘Single Grass’ asset by https://sketchfab.com/oppne in combination with the foliage tool in unreal to paint in grass to the scene.
Here are some close ups of the character and textures:
The following link will show the 2 animations I made the walk cycle and the stance:
https://youtu.be/BmIPNy-SI9E